Quick Start and Workflow
glassyPDM is a CAD collaboration solution that allows for small teams and organizations to stay in sync and iterate quickly.
Installation and First-time Setup
You can find the latest installer for your operating system on the GitHub repository for the desktop client. Currently, only Windows is supported.
Server URL
When opening glassyPDM for the first time, you will be greeted with a server setup screen:
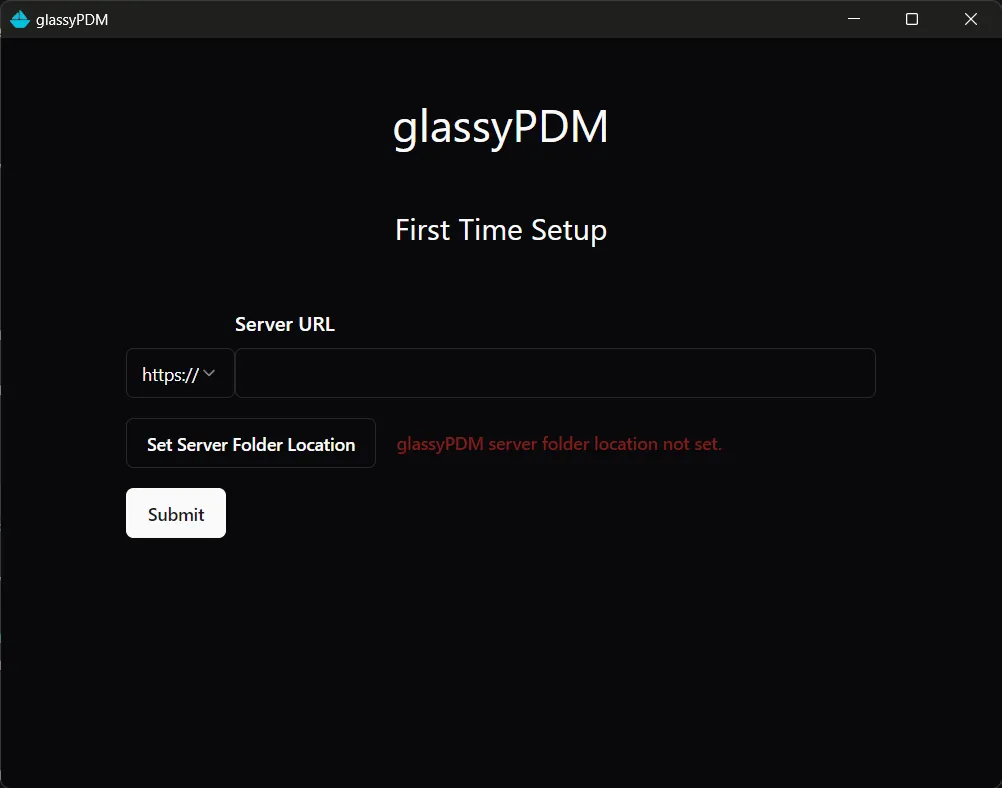
You should obtain a server URL to input here from your team/organization.
Be sure to select the correct scheme for your URL - there’s no need to include the https:// or http:// part of the URL in the text input.
After completing this, you’ll be greeted with a login screen. Once you’ve made an account, your team lead can add you to your team.
Client Overview
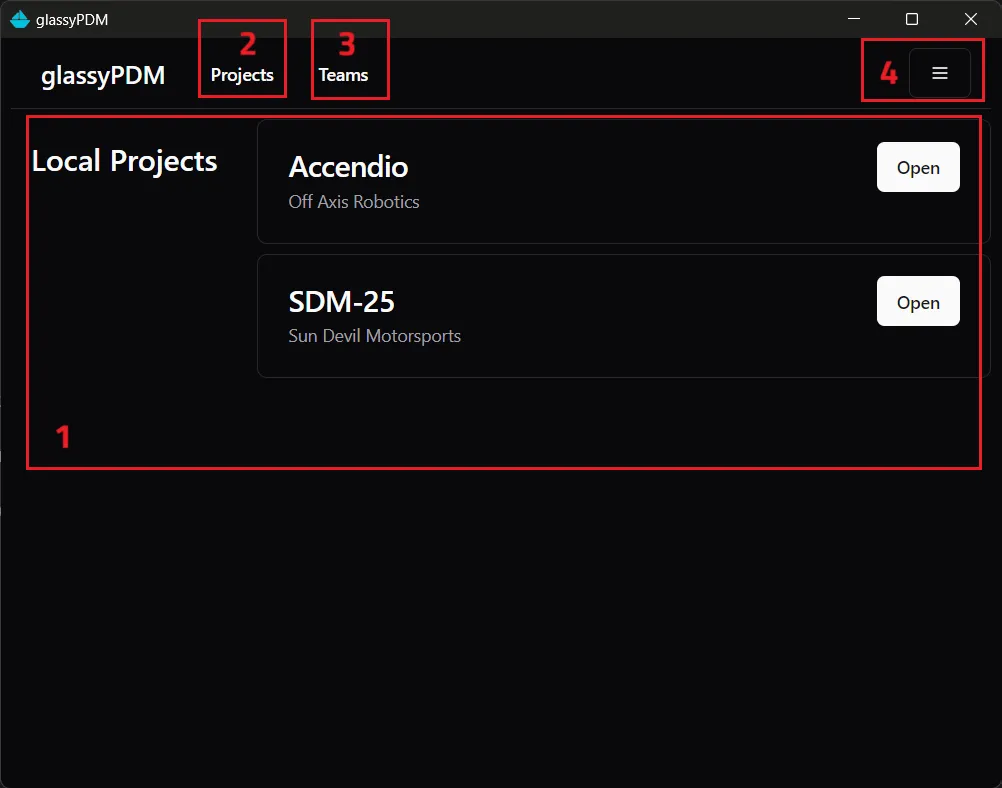
- List of projects that are being tracked locally
- View all projects you have access to
- View your teams
- Dropdown menu with:
- Client information
- Settings
- Log out
Client Updates
glassyPDM will automatically update when there is a new version available. You can view a changelog on GitHub here.
Suggested Workflow
 Once you’ve been added to a team, you’ll be able to view the team’s projects in the Projects page.
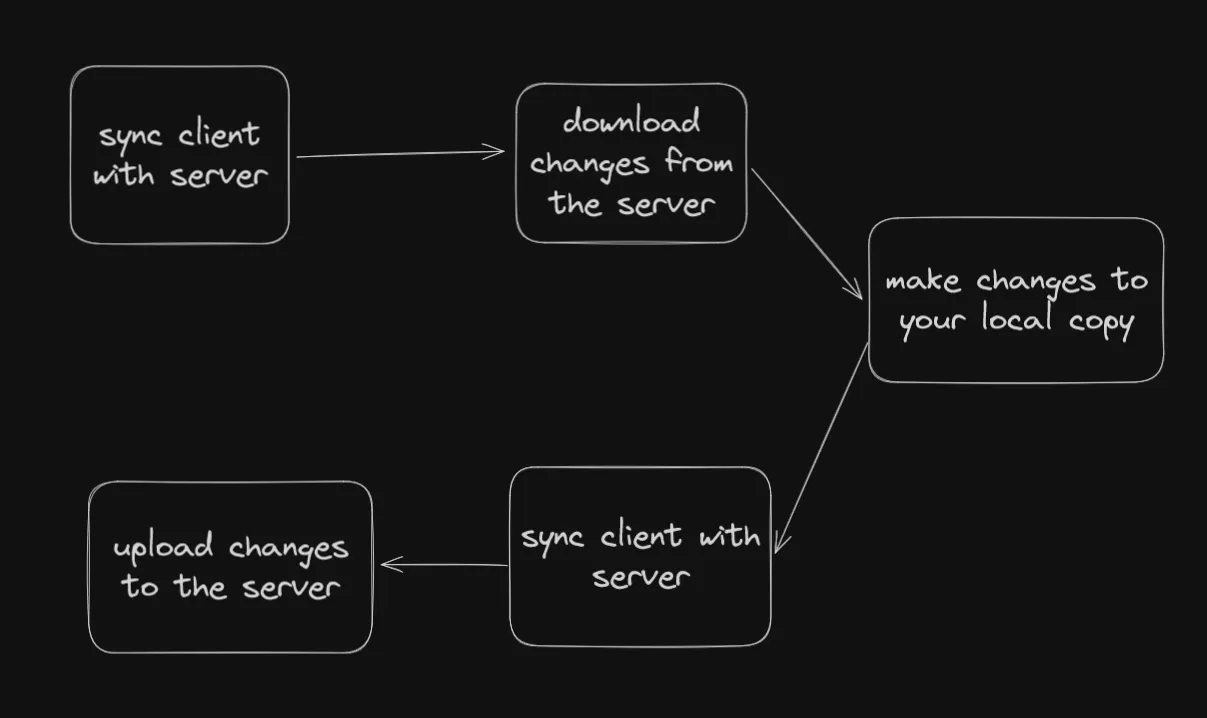
The first step to get a project downloaded is to sync your client with the server. This will do three things:
- Search your local project directory for any file changes made
- Fetch the current project state from the server
- Determine what needs to be downloaded from the server, and what needs to be uploaded to the server
Depending on the size of the project, this may take a while.
After syncing, you will be able to download or upload changes if pertinent.
Uploading files can be done in a similar fashion to downloading them, with the key difference being you can add a message describing the changes being uploaded. Note that to upload files, you will need pertinent permissions to do so.
If more than 200 files are being uploaded, glassyPDM will automatically break up the project update into different parts.
Project History
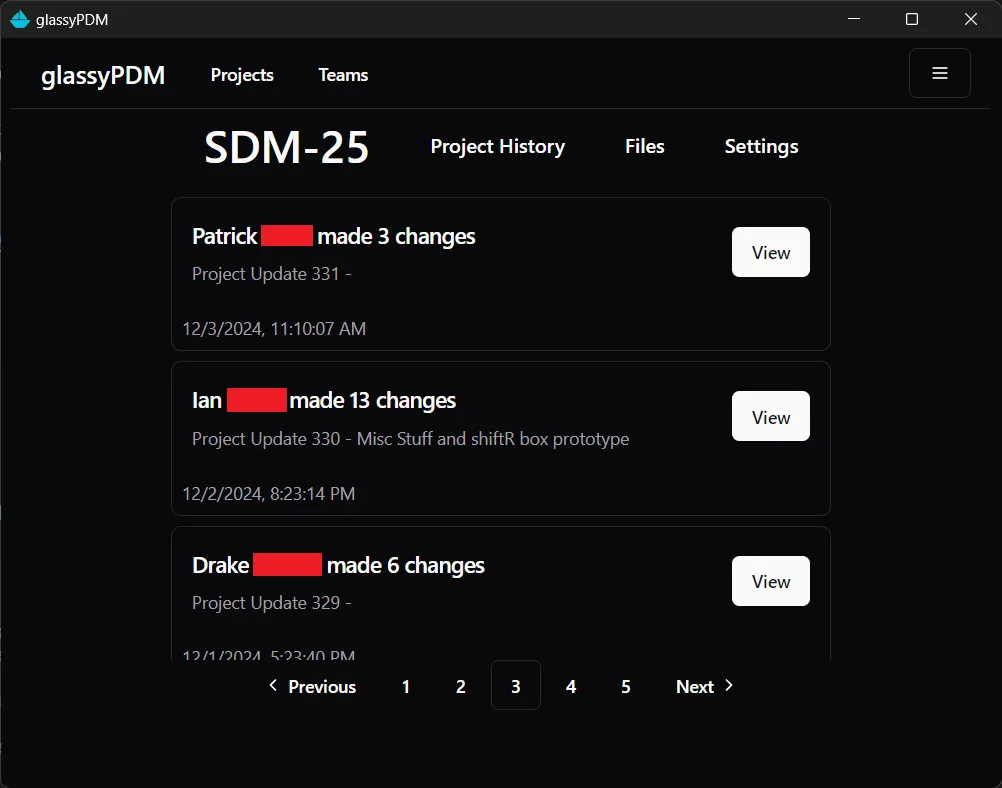 You can view project updates by navigating to the Project History tab of a given project.
There, you will be able to see what files have been updated, and download them if desired.
You can view project updates by navigating to the Project History tab of a given project.
There, you will be able to see what files have been updated, and download them if desired.
Further Resources
You’re all set up now!
You can learn more about the desktop client settings here.
If you are a team lead, proceed to Permissions to learn more about the permissions system in glassyPDM.